

How To Repair A Damaged Car Bumper
How to Use a Plastic Bumper Repair Kit to Fix Scuffs and Cracks
Car bumpers are so prone to being damaged. A slight wrong move during a manoeuvre or a simple reversing blow and yous tin can terminate upward with scuffs, scratches and even cracks.
The good news is that almost modern bumpers are plastic covers, with steel structures hidden further back. This means the impairment is unremarkably cheaper and easier to prepare than it would be on metal and chrome bumpers.
You may be able to repair plastic bumper scuffs and scrapes with a DIY kit at home. But if your bumper is cracked or split, the repair procedure becomes more complicated as yous need to seal the split. It involves sanding, sealing, sculpting and painting, so it'south non a job for DIY novices.
Choosing a repair kit
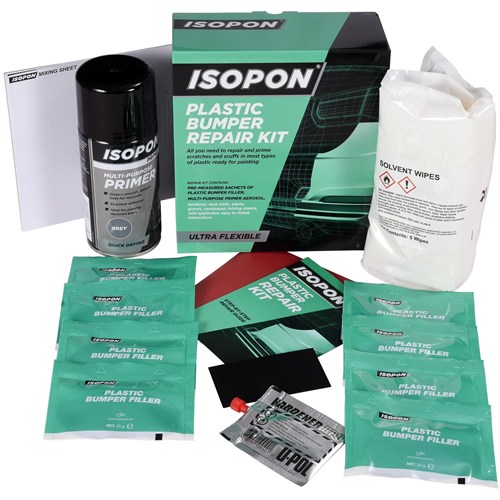
If you are thinking of trying to fix the damage yourself, at that place are a range of plastic bumper repair kits available. These are a skilful idea considering they incorporate all the materials you need and will exist compatible, rather than trying to purchase products separately.
Yous should besides choose a dedicated bumper repair kit which uses a filler that'south meant to be flexible and movement with the plastic, preventing time to come cracks in the bumper.
And think that the kits don't contain pigment and finishes – this needs to be bought separately.
Well-nigh bumper repair kits are suitable for most types of plastic bumpers. But if y'all want to double-bank check, the bumper should have a postage on the inside telling you lot what type of plastic information technology's made of – then you lot'll need to speak to your local car parts shop to find out which production is best for you.
How to use a bumper repair kit
If your plastic bumper has scuffs and scratch impairment, the repair tin exist carried out but on the front side of the bumper. Nevertheless, any cracks or splits should be repaired from the front end and back. Make sure you work in a dry out place like a garage and take your time with the process – it can be fiddly merely rushing information technology will create a bad stop.
- Thoroughly make clean the bumper inside and out. Any dirt or grease will terminate the filler bonding properly and ruin the appearance of the repair. Let to dry and wipe downward with solvent wipes, which are usually included in the kit.
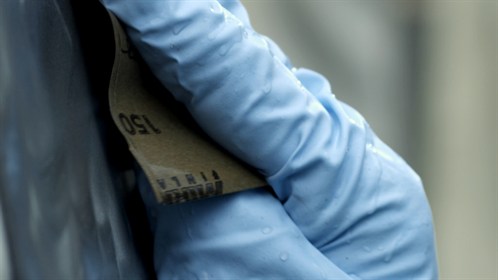
- Inspect the damaged area closely. If any shards of plastic are sticking up, carefully remove them with a knife or blade. Then sand the area by hand with eighty dust sandpaper to remove raised or sharp edges and leave a somewhat rough finish – this will give the filler something to bail with. Wipe away the dust with a slightly damp cloth.
- If your bumper is cracked or split, line up the two sides and then they sit level and hold in place on the front side with strong masking tape.
- Now you'll need to repair the dorsum of croaky bumpers. Some kits contain a solution to assistance the filler bond to the plastic – utilise this first and let to dry.
- And then apply a good layer of plastic filler material, spreading it out over and beyond the surface area needing the repair. Bear in mind that the filler ordinarily starts drying quite chop-chop, and then you will need to work fast hither.
- Next, accept the bonding mesh and cut it to size, leaving it to extend i inch by all sides of the damage. Attach the mesh over the damage to pin the 2 sides of the crack in place.
- Apply a liberal layer of filler over the mesh to completely cover information technology. Smooth it out and allow the filler to harden for the fourth dimension stated on the pack instructions earlier you first work on the front end of the bumper.
- Remove the masking record and sand downwardly the impairment at the front to make the expanse a little low and create a rough surface for bonding. Utilise bonding liquid if supplied.
- Apply a liberal amount of repair cloth to the damaged area so that yous brand the surface a little college than surrounding bumper. Utilise a spreader like a duster to carefully smooth out the filler. Make sure to push the filler into any scratches to fill up them right to the lesser. Cover with smoothing movie if supplied and allow to dry and fully harden.
- Sand the repair expanse level, commencement with lxxx dust sandpaper and then with a fine grain sandpaper to smooth information technology out. If needed, employ another light layer of filler over whatever gaps or dips to restore the original contours.
- Once hardened, finish the sanding with moisture fine grit sandpaper for a really smoothen end and wipe away any dust.
- Now your repair is finished, it'due south time to prime and paint the bumper. You lot'll need proper bumper primer and paint that is flexible enough for plastic, otherwise it may cleft and flake. Yous will too need to utilize a clearcoat over the finished paint to keep it in good condition and prevent more than damage. Utilize at least two coats of each, primer, pigment and clearcoat, allowing to dry fully between coats. Note that plastic bumper repair kits don't come up with paint or finishes, merely may contain primer.
- Get out a paint chore to dry at least overnight.
Subsequently any paint repair, it'south best to wax the auto, preferably professionally to keep the paint in the best status. Wait at least a week after the repair before waxing.
Hither are some great resource to assistance you lot carry out a paint repair on your car:
- How to find your machine's paint colour code
- How to bear upon upwardly car paint
Professional plastic bumper repairs
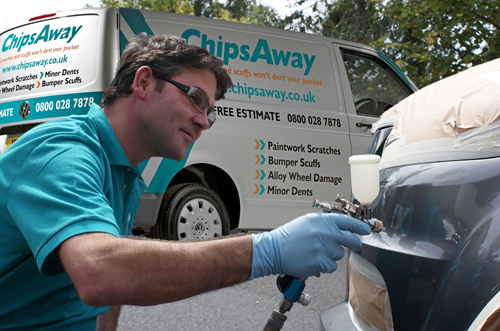
If you're not comfortable with DIY kits, become professional plastic bumper repairs for scuffs, scrapes and cracks with ChipsAway. We're the U.k.'s leading automobile body repair specialists and our technicians can prepare your bumper in simply a few hours.
Request your free estimate online today.

How To Repair A Damaged Car Bumper,
Source: https://www.chipsaway.co.uk/blog/how-to-use-a-plastic-bumper-repair-kit-to-fix-scuffs-and-cracks/
Posted by: hoytjusbabyes.blogspot.com
0 Response to "How To Repair A Damaged Car Bumper"
Post a Comment